ownCloud was developed with Linux and Unix based operating systems in mind so if you are looking to implement ownCloud in a production environment you probably should install it in a Linux server. But installing ownCloud in a Windows server is certainly possible now that PHP is supported in all Windows servers starting from Windows server 2008.In this tutorial we will install ownCloud in a Windows 2016 server.
Table of Contents
Prerequisites
[adinserter name=”Block 1″]
In order to finish this guide successfully you need the following:
- A Windows Server 2008 or later installed and fully updated
- IIS with CGI support enabled on the server
- MySQL
- PHP 5.4 or higher
Installing IIS
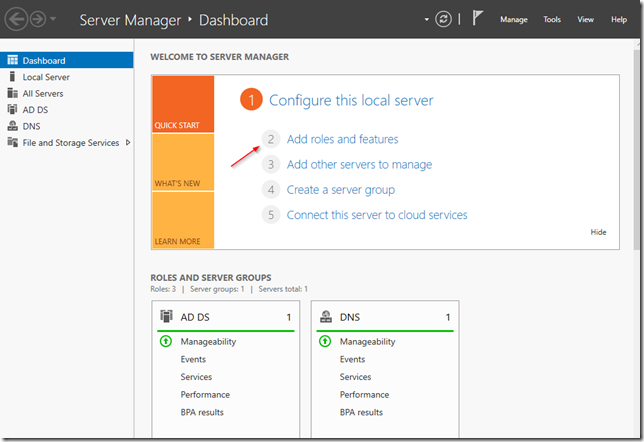
Login to your Windows server then click on Server Manager in your Start menu, and then click on Add roles and features:
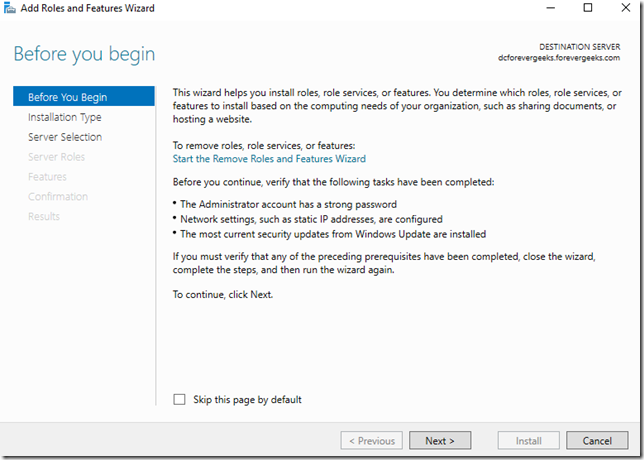
The Add roles and features wizard will come up. click on Next:
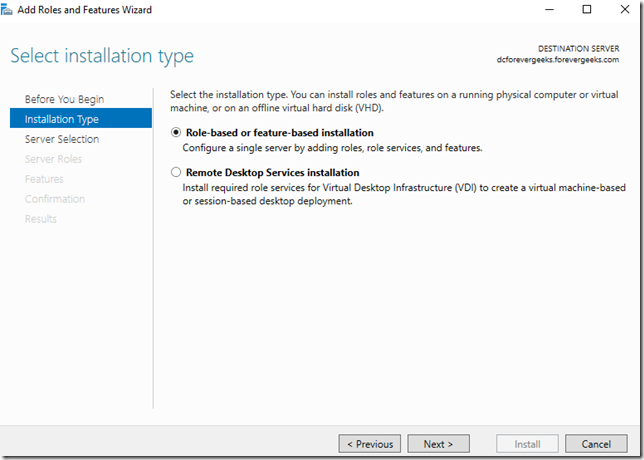
On the “Installation Type” Window choose “Role-based or feature-based installation:
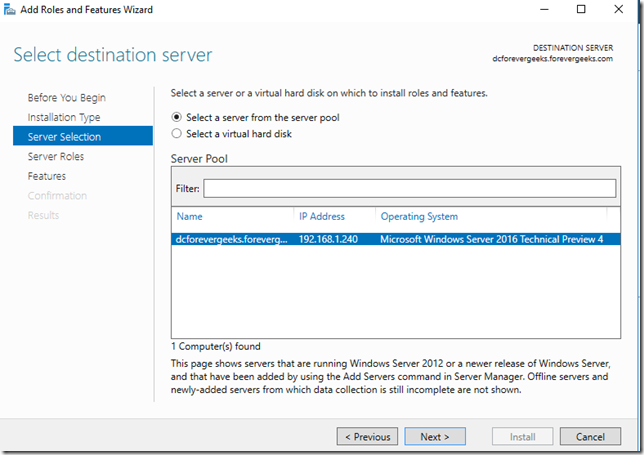
Click on Next. on the “Server Selection” screen choose your server from the server pool:
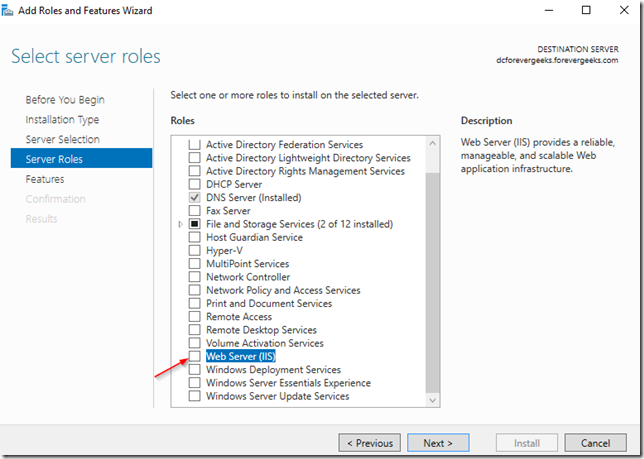
click on Next. on the “Select Server Role” window, check the Web Server (IIS ) role:
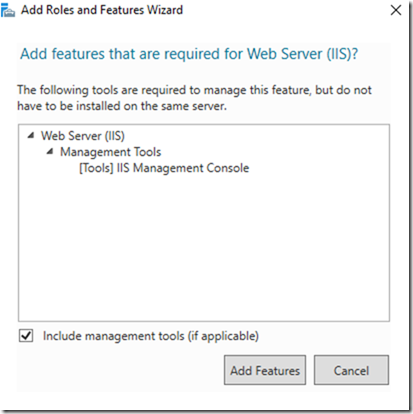
the Add roles and features window will pop-up:
Click on Add Features then click Next.
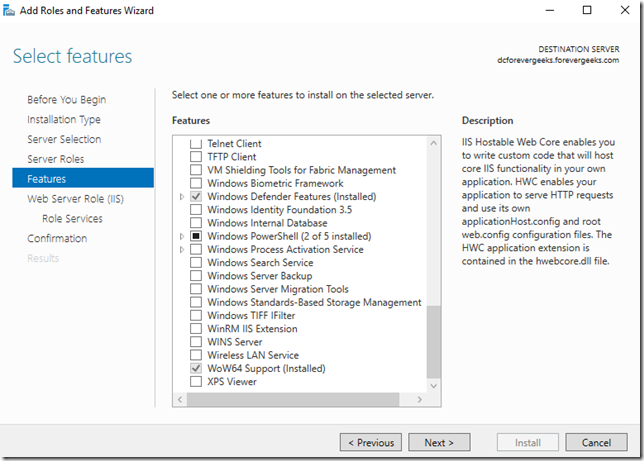
Click Next .
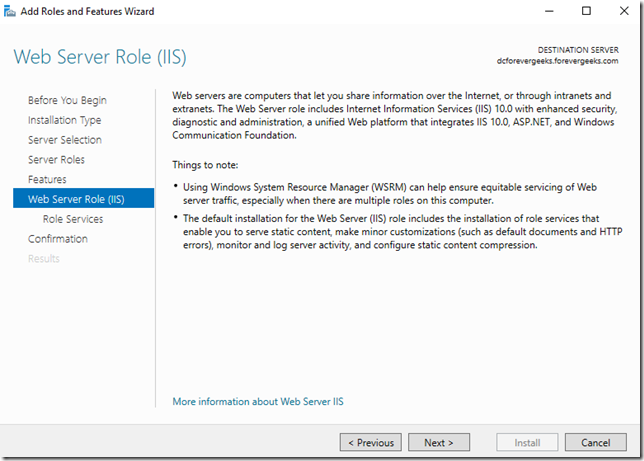
click Next
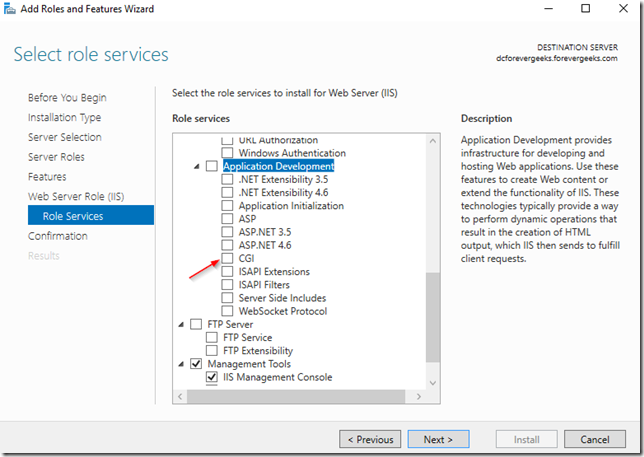
On the “Role services” window make sure CGI is check under the Application Development group. after you do that, click Next.
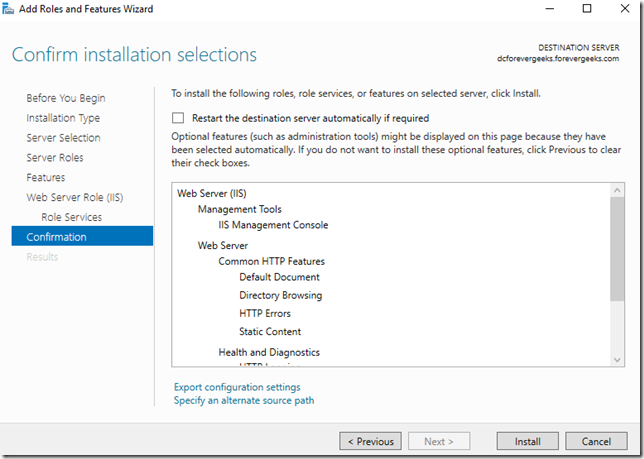
Click on Install in the confirmation window.
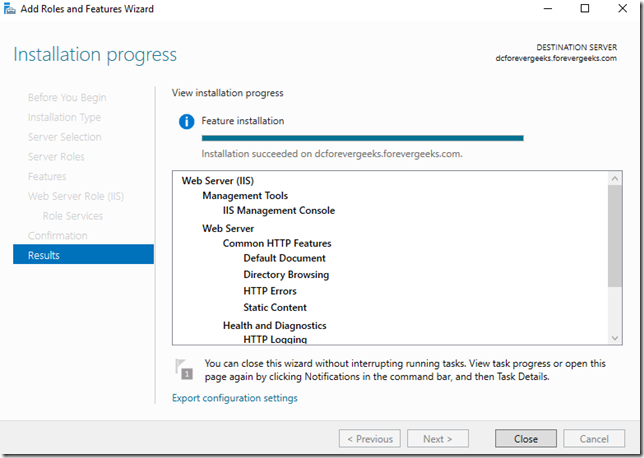
IIS with CGI support should be now installed in your server.
Installing PHP and MySQL
[adinserter name=”Block 1″]
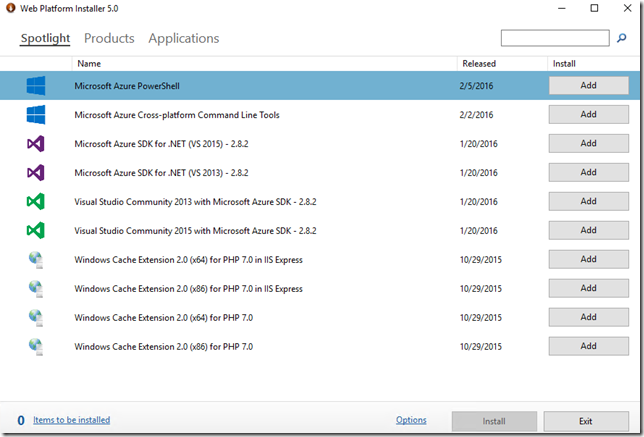
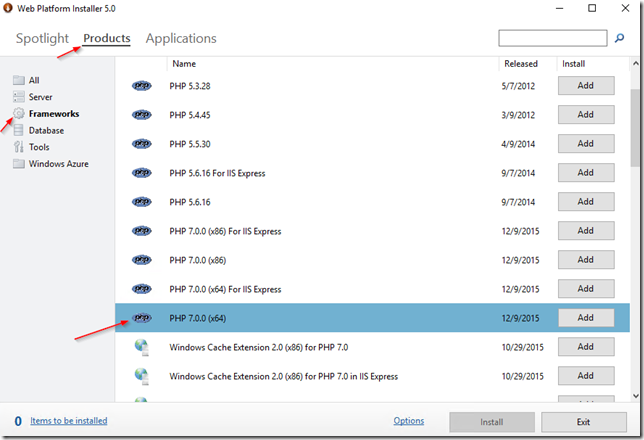
The easiest way to install PHP and MySQL at once in your Windows server is using the Microsoft Web Platform installer found in this URL https://www.microsoft.com/web/downloads/platform.aspx download and execute the wpiluancher.exe file . select the default settings during the installation until you get to this window:
On that Window click on Products then Frameworks and choose the latest PHP version from the list. the latest PHP version at the time of this writing is version 7.0.
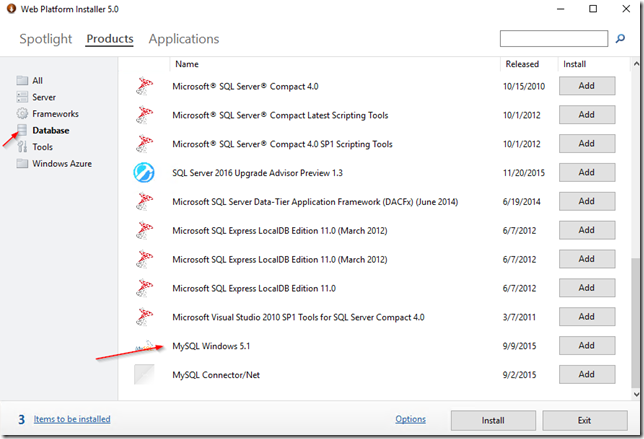
Click on Add then click on Database and add MySQL Windows as well:
Click on Install after you have added both.
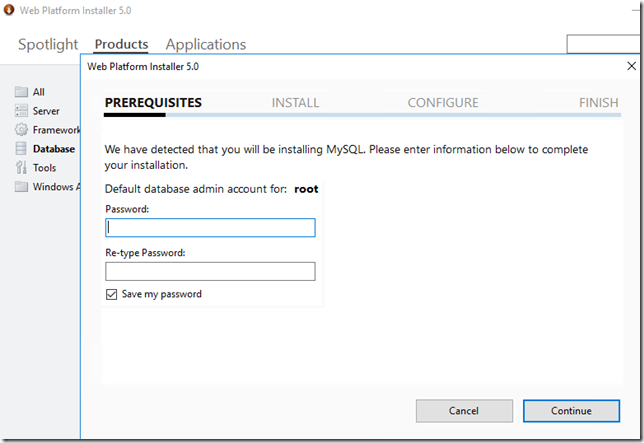
Select a password for your MySQL server:
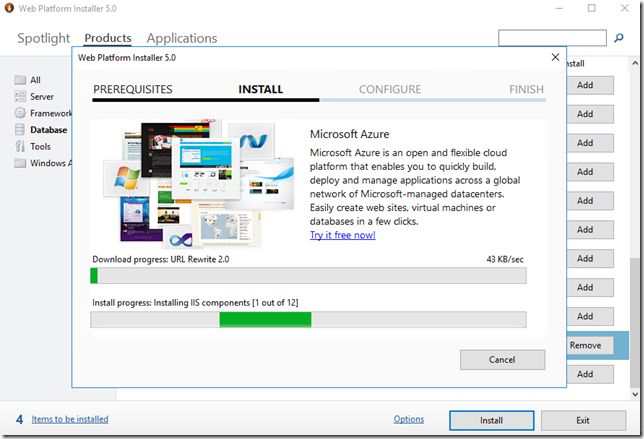
click on I Accept in the following window. and the installation will begin.
MySQL and PHP should be installed on your server now.
Note: if you get any error saying that PHP manager cannot be installed. make sure .NET 3.5 with HTTP Activation is installed on your server. somehow PHP manager needs that.
Create MySQL Database
Login to your MySQL server using CMD. open cmd on your server, and switch to this path cd “C:Program FilesMySQLMySQL Server 5.1bin” then login to your MySQL server
mysql -u root -p
To create the ownCloud database type this:
create database owncloud ;
then type exit. you can also create create a different user to use with your ownCloud database if you don’t want to use the root account. see this section Create new user in MySQL if you want to do that.
Installing ownCloud
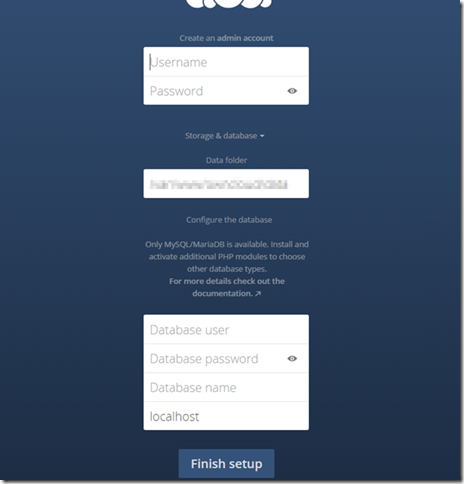
From your server download the latest ownCloud zip package from this URL https://owncloud.org/install unzip it and then move it to your C:inetpubwwwroot web directory. type in the name of your site (e.g. localhost/nameofyoursite ) or the IP address of your server in the browser, and the ownCloud installation wizard should come up:
Enter the username, password, and the data folder location. click on Finish setup after you are done entering that information, and ownCloud should get installed on your Windows server!
Conclusion
Installing ownCloud in a Windows server is a lot more involved than installing it on a Linux server, but is not that hard. I hope you found this guide helpful, and please use the comments if you have any question.
Was this article helpful?
Your feedback helps us improve our content.
124 people found this helpful!


