We have a Lenovo iX2 NAS in our network that we purchased for the comms team to store their media stuff on, and even though the NAS is setup with a RAID 1 ( mirror ) configuration I don’t think that is enough to protect the data from a system failure. My original plan was to buy another NAS to replicate the data between the two devices, but after doing some research I realized that dumping a copy of the data to Amazon S3 would be better. That way we have a copy of the data off our network, and I don’t have to babysit yet another device.
Create an Amazon S3 bucket
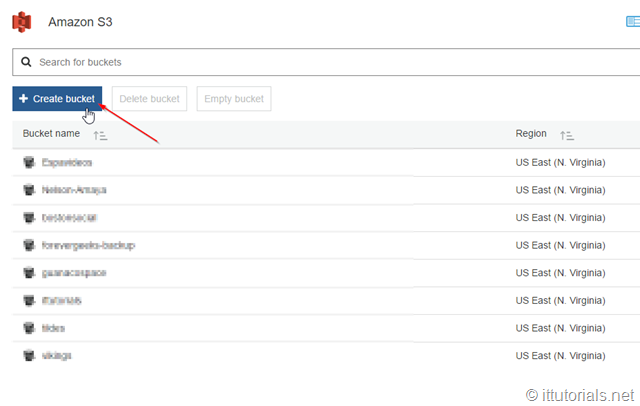
Connecting the Lenovo iX2 to Amazon S3 is actually quite easy, the only thing you need to have before hand is an Amazon S3 account. If you don’t have an account yet, create one using this URL https://aws.amazon.com/s3/ once you have created the account, go to your Amazon S3 console, and create a bucket:
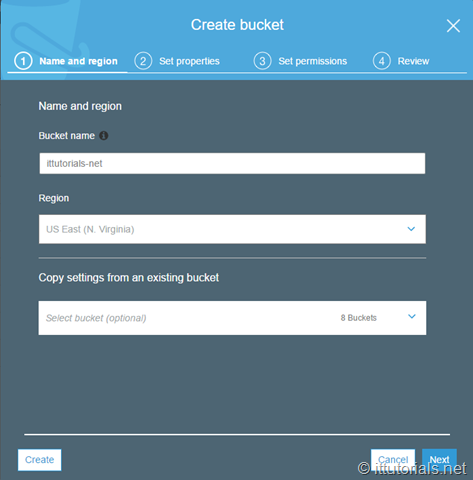
Give a name and select the region for your bucket:
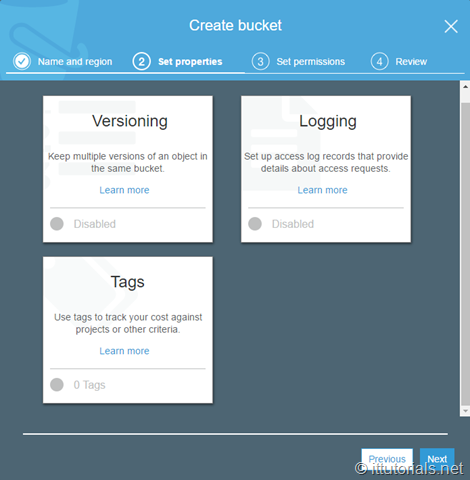
Set the properties ( like versioning, tags, and logging ) for your bucket. I left this blank for now:
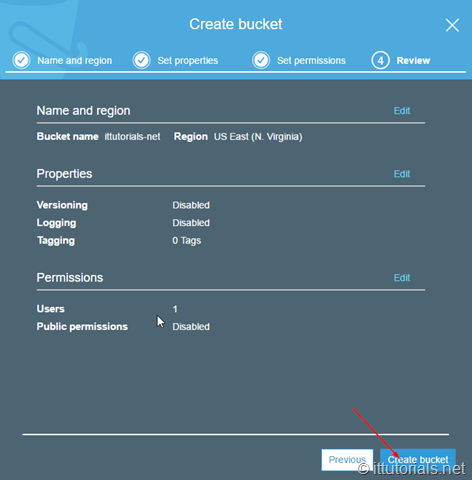
Set the permissions on the next screen. If you just created your Amazon S3 account, most likely the only account listed there would be yours, make sure you have read/write permissions to the bucket, and click next, and create the bucket:
Get the Amazon S3 security credentials for your bucket
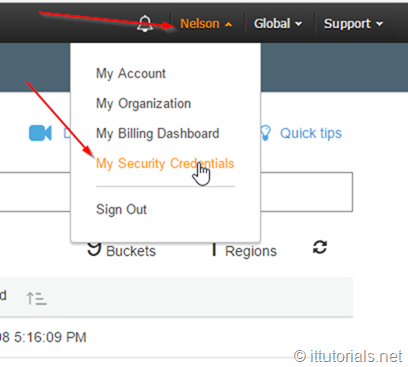
To get your security credentials click on your Account name and click on My Security Credentials link:
You will get this pop-up:
Download your key file. you won’t be able to see the “secret” key once you close this popup:
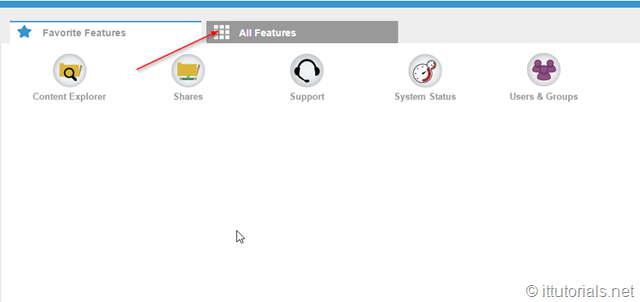
Now that you have your Amazon S3 access keys login to your NAS Web portal interface, and click on All Features:
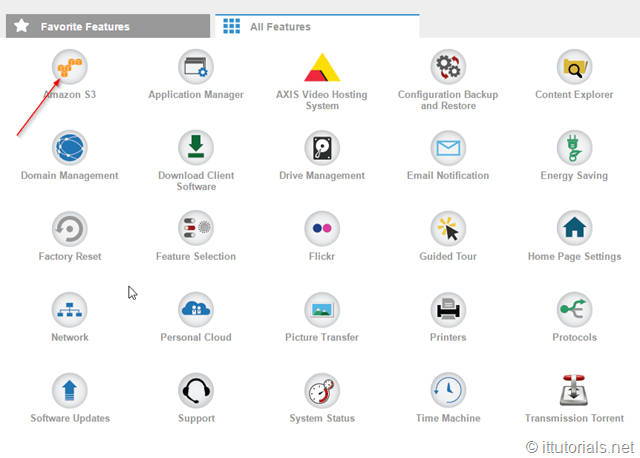
Then click on the Amazon S3 icon:
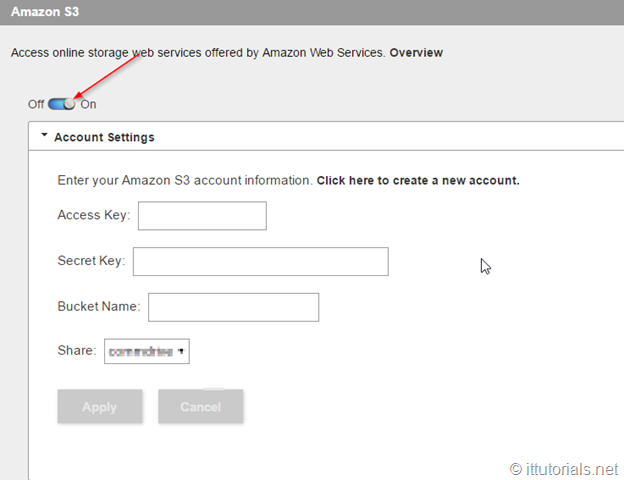
turn on the feature, and then enter the Access key, Secret Key and the Bucket name and the Share you want to sync to Amazon S3:
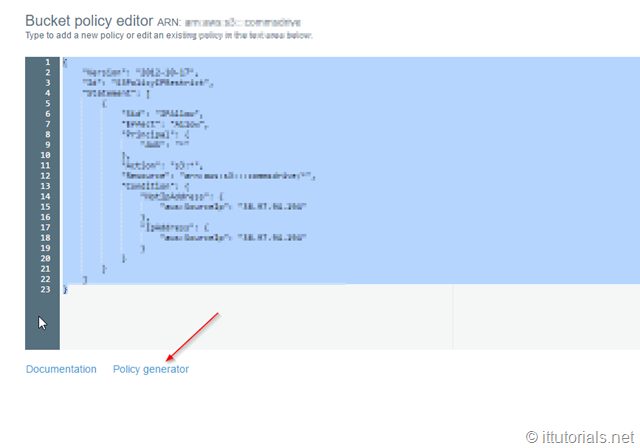
Somehow the the NAS wasn’t connecting to the bucket because of permissions, so I created a Bucket policy to allow access to the bucket by IP address ( This would be your firewall public IP address, which means everyone in your network will have access to the bucket )
{
    "Version": "2012-10-17",
    "Id": "S3PolicyIPRestrict",
    "Statement": [
        {
            "Sid": "IPAllow",
            "Effect": "Allow",
            "Principal": {
                "AWS": "*"
            },
            "Action": "s3:*",
            "Resource": "arn:aws:s3:enteryourbucketnamehere/*",
            "Condition": {
                "NotIpAddress": {
                    "aws:SourceIp": "yourIP"
                },
                "IpAddress": {
                    "aws:SourceIp": "YourIP"
                }
            }
        }
    ]
}
After creating this permission policy and reentering the the bucket information in the Lenovo iX2 S3 interface, the NAS started syncing:
I copied that policy from the Amazon website, and is not very well defined I think, but it does the job. If you are in a hurry, just use my policy above and enter your information, or you can generate your own Policy using the wizard:
Conclusion
As you can see, connecting your Lenovo Iomega ix2 NAS to Amazon S3 is not that complicated, and for pennies at month, you can have a peace of mind knowing that the data is safe.
Leave a comment below if you have a question.
Was this article helpful?
Your feedback helps us improve our content.
4 people found this helpful!


