In this tutorial I will show you step by step how to enable the Hyper-V role in Windows Server 2016. Windows Server 2016 was released in October 12, 2016 and it packs many new virtualization features. To learn about all the new features in Windows 2016 take a look at this section. These are some the features I find interesting in Hyper-V 2016:
Table of Contents
Hot swappable network cards and memory
Yep! no more reboots to add network adapters or memory to VMs. With hyper-V 2016 you can add and remove network adapters and memory to a VM without rebooting the server. This feature only works on Gen2 VMs and it works on Windows and Linux VMs
Nested Virtualization
This feature let you run Hyper-V on a virtualized server. In previous Windows versions, you needed to have a physical server to enable the Hyper-V role, in Windows Server 2016 you can enable the role on a server running in a VM. This feature is good if you have a testing environment like I do.
Production Checkpoints
If you’ve dealt with Hyper-V snapshots before, you know they can become a pain to deal with sometimes. Production snapshots are based on images ( backup files ) instead of a saved state of the VM. I guess this feature is useful if you want to keep “real” backups of your VMs. The standard snapshot feature is also included if you just want to take a quick snapshot of the VM before doing any changes for example.
Shielded Virtual Machines
This features is intended for people needing to run super secure VMs. When you turn on this feature in Hyper-V only a few computers configured to have access to the VM can see the screen, hard drives. The VM is pretty much shielded to unauthorized hosts.
Windows Containers
Windows 2016 gives you a taste of the containerization world! Containers have been around in Unix operating systems for a long time, but they never were popular until now. Containers are like VMs but unlike VMs they don’t require hypervisor isolation, using namespaces applications are isolated on the same OS, this process help you save computer resources by not installing an OS every time you need to host a new application.
Windows Containers allow many isolated applications to run on one computer system. They’re fast to build and are highly scalable and portable. Two types of container runtime are available, each with a different degree of application isolation. Windows Server Containers use namespace and process isolation. Hyper-V Containers use a light-weight virtual machine for each container.
Windows PowerShell Direct
This feature basically allows you to run PowerShell commands on VMs from the host. It’s a quicker way to manage your VMs instead using remote desktop or remote PowerShell.
Rolling Hyper-V Cluster Upgrade
If you are upgrading from Server 2012, then this feature will help you upgrade your cluster without causing any downtime.
There are a lot more features and improvements on Hyper-V 2016, but these are the features I find most interesting. If you want to play with Hyper-V 2016 this is how you install the server role. Remember you can do this on Server 2016 even when running on a VM. so assuming you have already installed the operating system here is how you install it.
Installing The Hyper-V Role
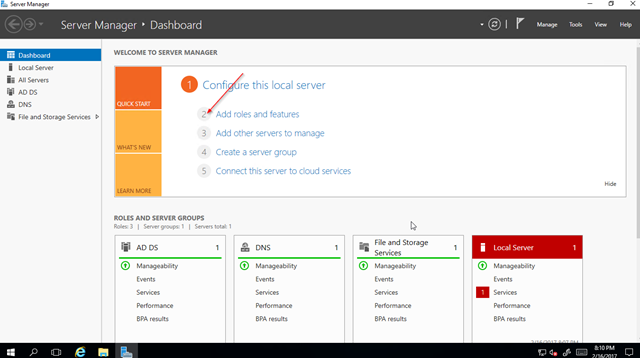
Login to your server and open Server Manager and then click on Add roles and features:
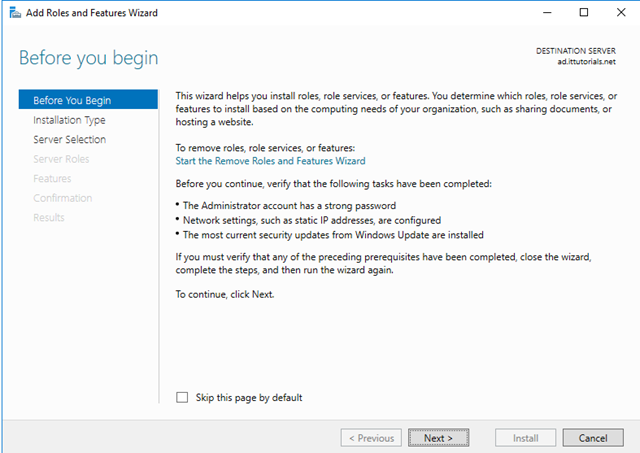
The add roles and features wizard will come up:
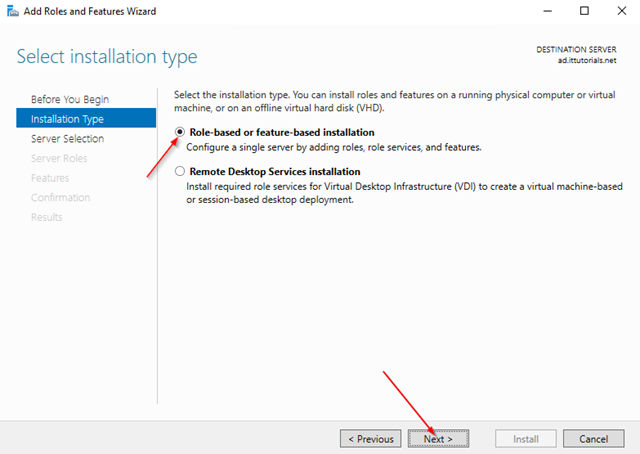
click on Next. then choose Role-based or feature-based installation on the next screen:
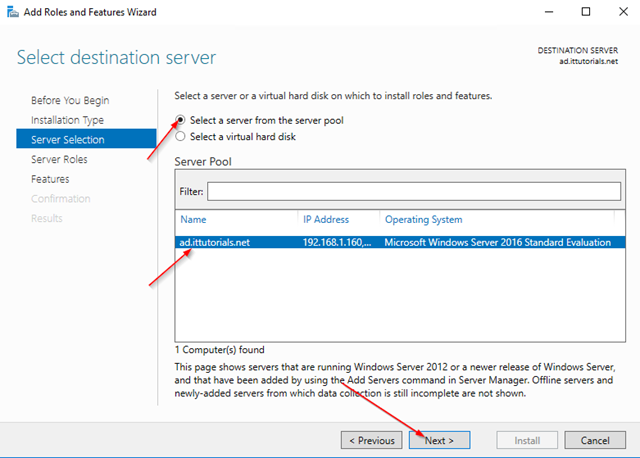
On the next screen Select the server from your server pool and click Next:
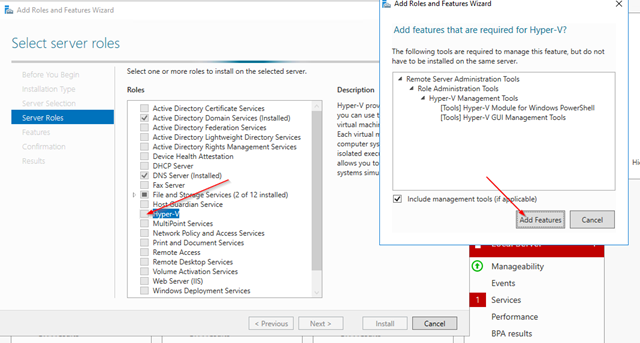
Select the Hyper-V role on the next screen and click Add Features on the popup window:
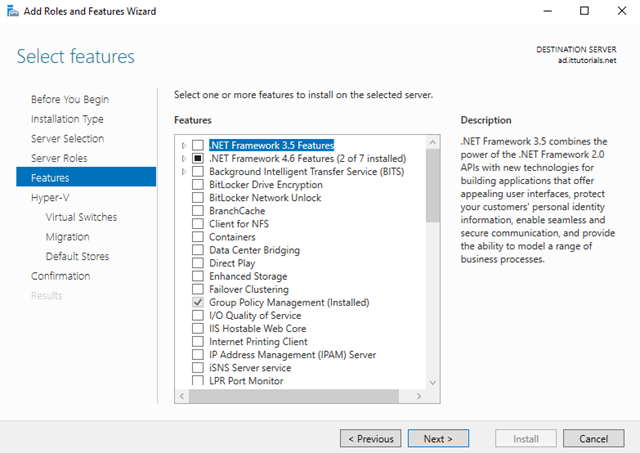
Click on Next, and click on next on the feature window as well:
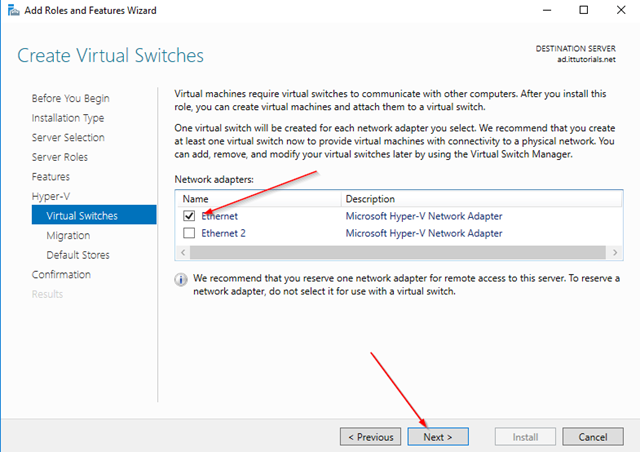
Next choose your Ethernet connection for your Virtual Switch . Choose the default one or create a custom connection for your VMs. You can add virtual switches to your VMs later if you need to:
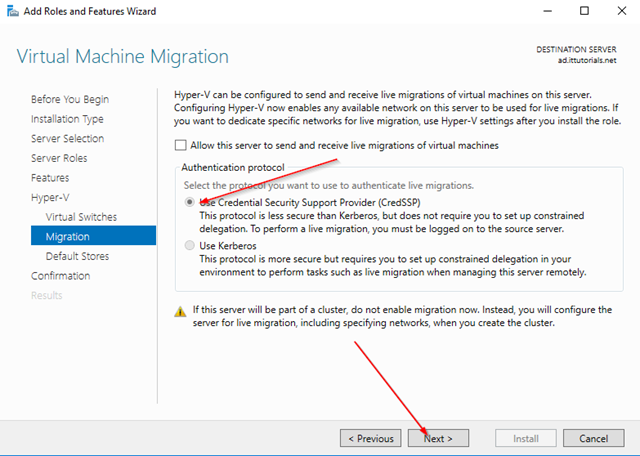
On the next screen choose your “Live Migration” options. If the server will be part of a cluster group, skip this part:
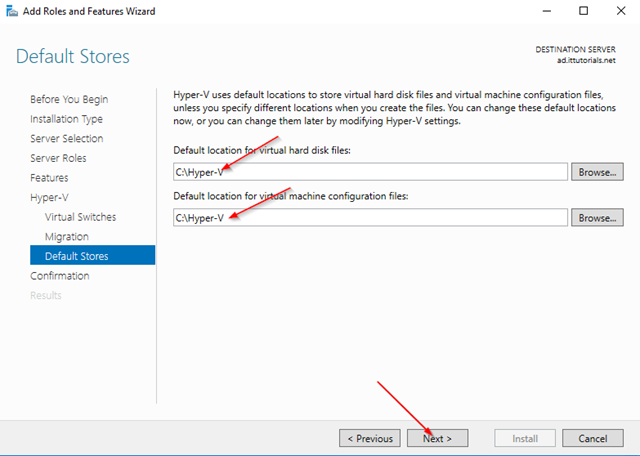
Next choose the storage location for your VMs:
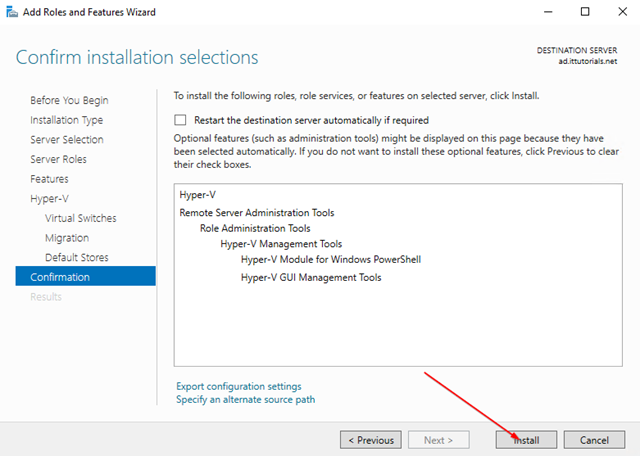
Click on Next, and then Install:
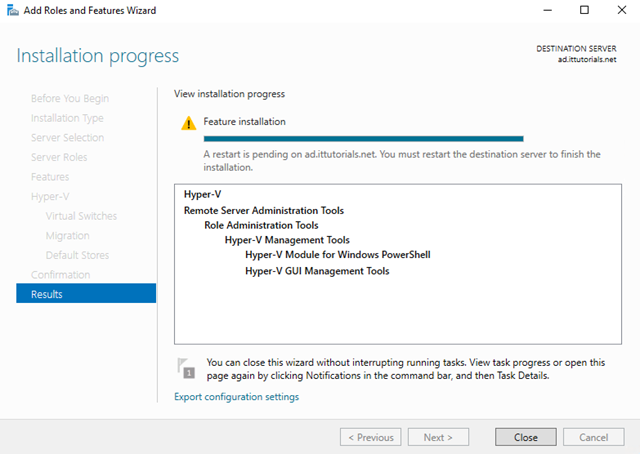
Reboot the server after the role is installed:
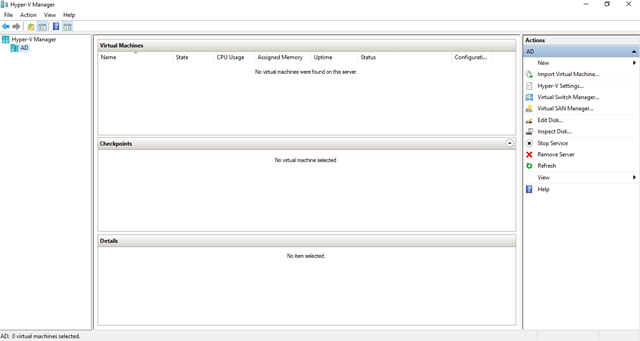
After the server comes back from the reboot, the Hyper-V role should be installed and working on your server:
have fun!


