When installing software like office 2003 becomes a daily routine on your job, is time to start looking for a way to automate those tasks.
Table of Contents
Getting Ready
there are many ways to automate the installation of office 2003, but the easiest one is using the Office 2003 resource kit from Microsoft. the first thing you need to do is to download the Office 2003 Resource Kit Tools from here.
Begin The Customization
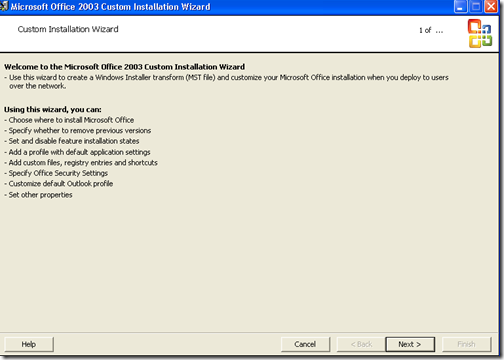
once that is downloaded, install it, and then go to Start – All Programs – Microsoft Office – Microsoft Office Tools – Microsoft Resource 2003 Resource Kit – Custom Installation Wizard. the custom installation wizard should come up:
click on Next.
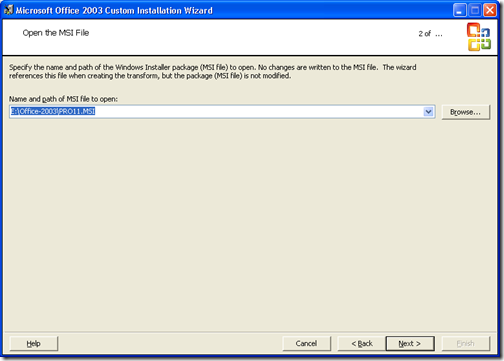
On the following screen, it will ask you to specify the path to the MSI file:
Click on Browse, and browse to the location where you have the office files. click Next.
on the following window, choose to create a new MST file. click Next.
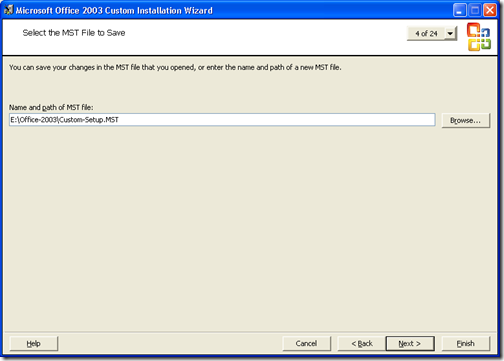
Choose where to save the MST file on the next screen:
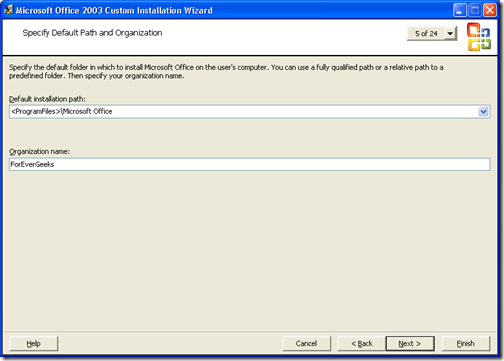
On the next window, choose the location where you want Microsoft Office to be installed. I recommend leaving the default location, also enter the name of your organization:
click Next.
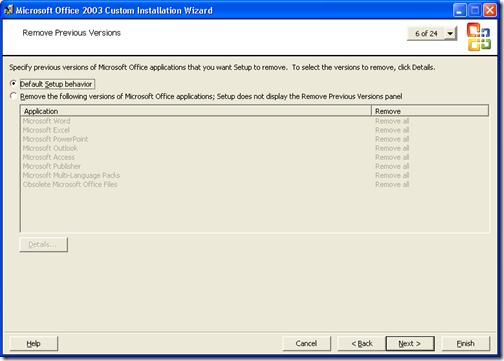
on the following Window, you have the option to remove any previous office installation, or leave whatever component you want from previous installations:
I’ll choose Default Setup Behavior click Next.
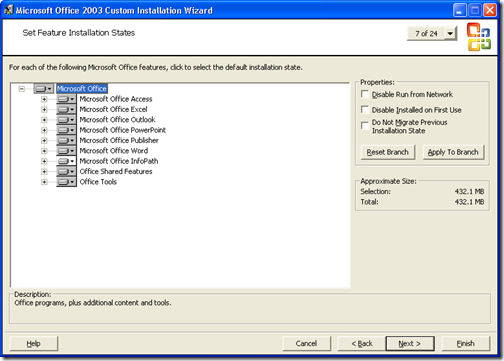
on the next window, you have the option to set the features you want on office. here you can tweak whatever features you don’t want people to have on their office applications:
after you finish tweaking, click Next.
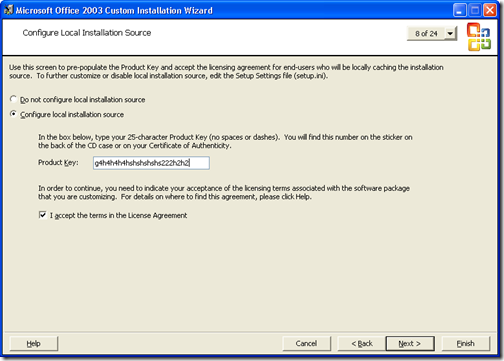
on the following screen, you will need to enter the product key. remember to enter the product key for network installation, it needs to be a volume licensed software. if you have the key, now is time to enter it:
accept the license agreement right underneath, and click Next.
on the next Window, you have the option to customize the default application settings. I’ll leave it as default and click next.
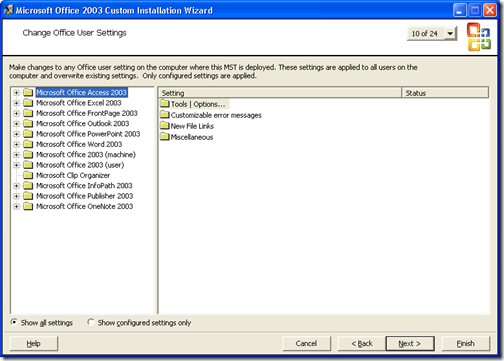
on the following screen, we have the option to change Office Users Settings:
from here, you have the option to disable or enable settings on each office application, think about your organization needs, and tweak accordingly, after you finish, click Next.
next, you are asked to add or remove files you want to get rid of or add on user’s computer. I’ll leave as default, and click next.
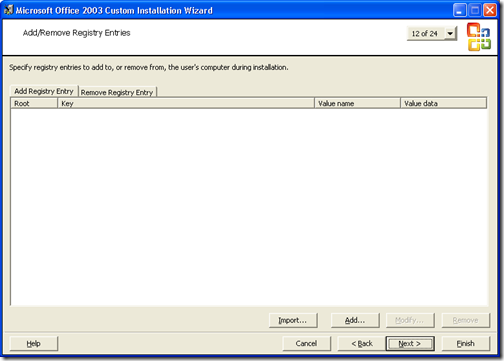
next, you are asked to specify registry entries you want to add or remove:
click Next.
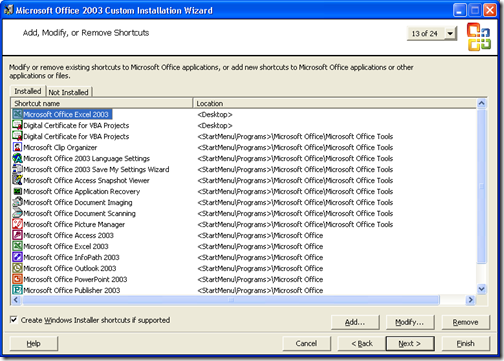
next, you are asked to add or remove shortcuts, if you want users to have their office application shortcuts on their desktop, specify it here:
next, you are asked to specify additional installation point servers. if one installation point is not available then office will install from the other server. click next, if you don’t have another server.
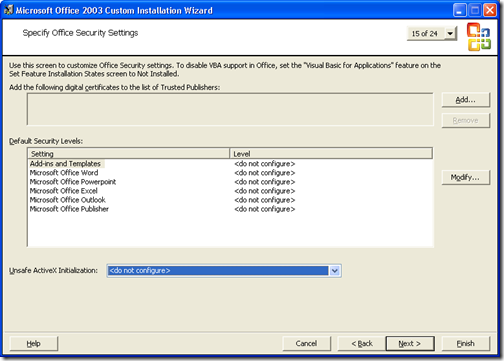
next, you are asked to specify the security settings you want:
I’ll leave as default, and click Next.
next, you are asked to add or installations and run programs. click Next.
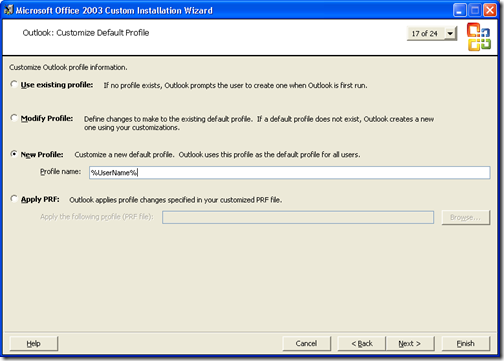
next, you need to configure the behavior of Outlook. select new profile, and as profile name type %UserName%
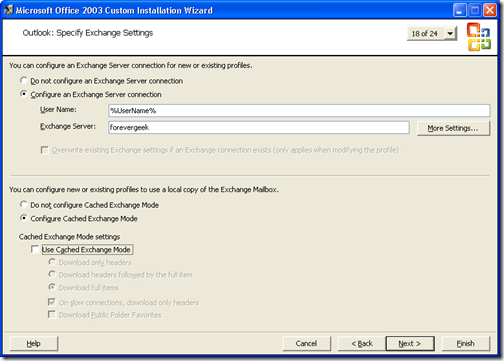
next specify the name of the Exchange Server: that should be no brainer:
also notice at the bottom; you have the option to configure if you want to run exchange cache mode, I would not allow cache mode if the computer was a desktop, if the computer is a laptop then it could be a good idea to allow cache mode, to cache offline e-mails.
click next.
next, you have the option to Add Account. leave as default, and click Next.
next you are asked to remove accounts and export settings, leave as default, and click next.
next, you are asked to customize default settings, leave as default, and click next.
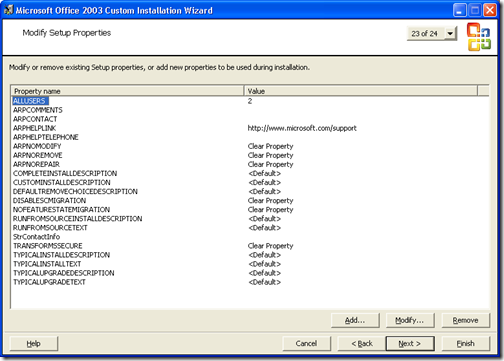
next, you are asked to modify setup properties:
No biggie, leave it as default, and click next.
Executing The Script
after that, you are DONE. click on Finish to save the settings.
Now, to use the newly created MST file you only type “setup.exe TRANSFORMS=E:Office-2003Custom-Setup.MST /qb-“ on the RUN command. of course that have to be your own MST configured file.
Was this article helpful?
Your feedback helps us improve our content.
3 people found this helpful!


